
AI and the Retail Marketer’s Future
How AI transforms strategy and processes, driving the adoption of Positionless Marketing
Exclusive Forrester Report on AI in Marketing

At Optimove, we're shifting our architecture from monolith to micro-services.
Why are we undergoing this transition? Our motivation comes from wanting to deploy and deliver small pieces of code to production, without depending on other components or teams. Thus, the cycles will become much shorter and the quality – much higher.
We're currently using .Net Core, swagger, and docker for this task. In this blog post, we will cover some basic concepts that will help you create an API used as a micro service, utilizing .Net Core.
We'll create a basic API with a customized response.
But let's back up for a moment; what is a micro service? And why do we want to create one?
What are Micro-services?
To help you grasp the concept, I've posted some quotes about micro-services below:
"A distinctive method of developing software systems that tries to focus on building single-function modules with well-defined interfaces and operations" (Smarbear)
"A micro-service is a self-contained piece of business functionality with clear interfaces, and may, through its own internal components, implement a layered architecture" (Wikipedia)
Why use Micro-services?
Micro-services have several benefits. They're:
And many more
Of course, there are a few downsides to microservices:
Two popular tools that will help us build our micro-service are Docker and Swagger. Let's delve into both.
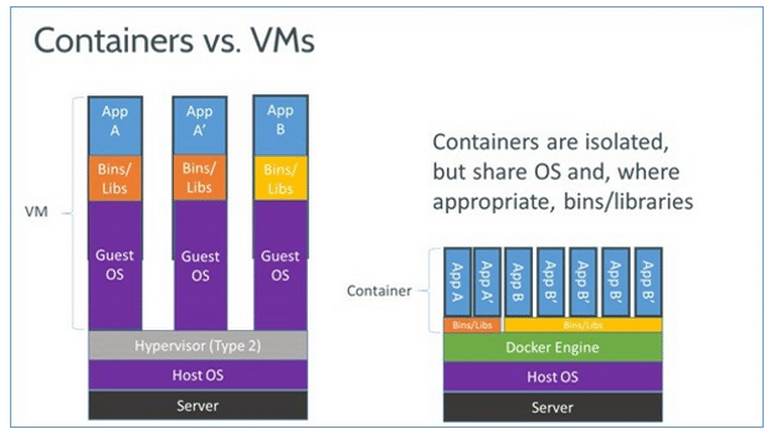
"In simple terms, Docker is a software platform that simplifies the process of building, running, managing and distributing applications. It does this by virtualizing the operating system of the computer on which it is installed and running." (FreeCodeCamp)
"Docker is a tool designed to make it easier to create, deploy, and run applications by using containers. Containers allow a developer to package up an application with all of the parts it needs, such as libraries and other dependencies, and ship it all out as one package." (Noteworthy)
Swagger is the most widely used tooling ecosystem for developing APIs with the OpenAPI Specification (OAS). Swagger consists of both open source as well as professional tools, catering to almost every need and use case.

Basically Swagger is great for API documentation, testing, and helping create both server projects in the language of your choice as well as client SDK projects.
This example will make it clearer:
API documentation:
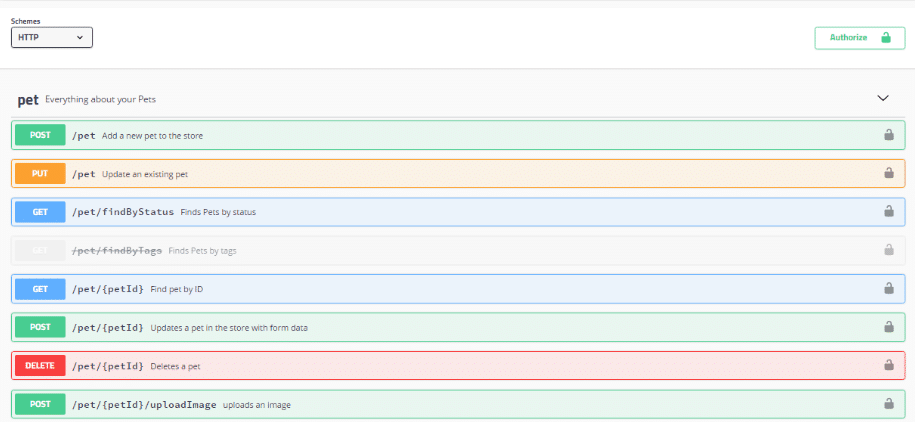
Testing your API via the comfortable UI:
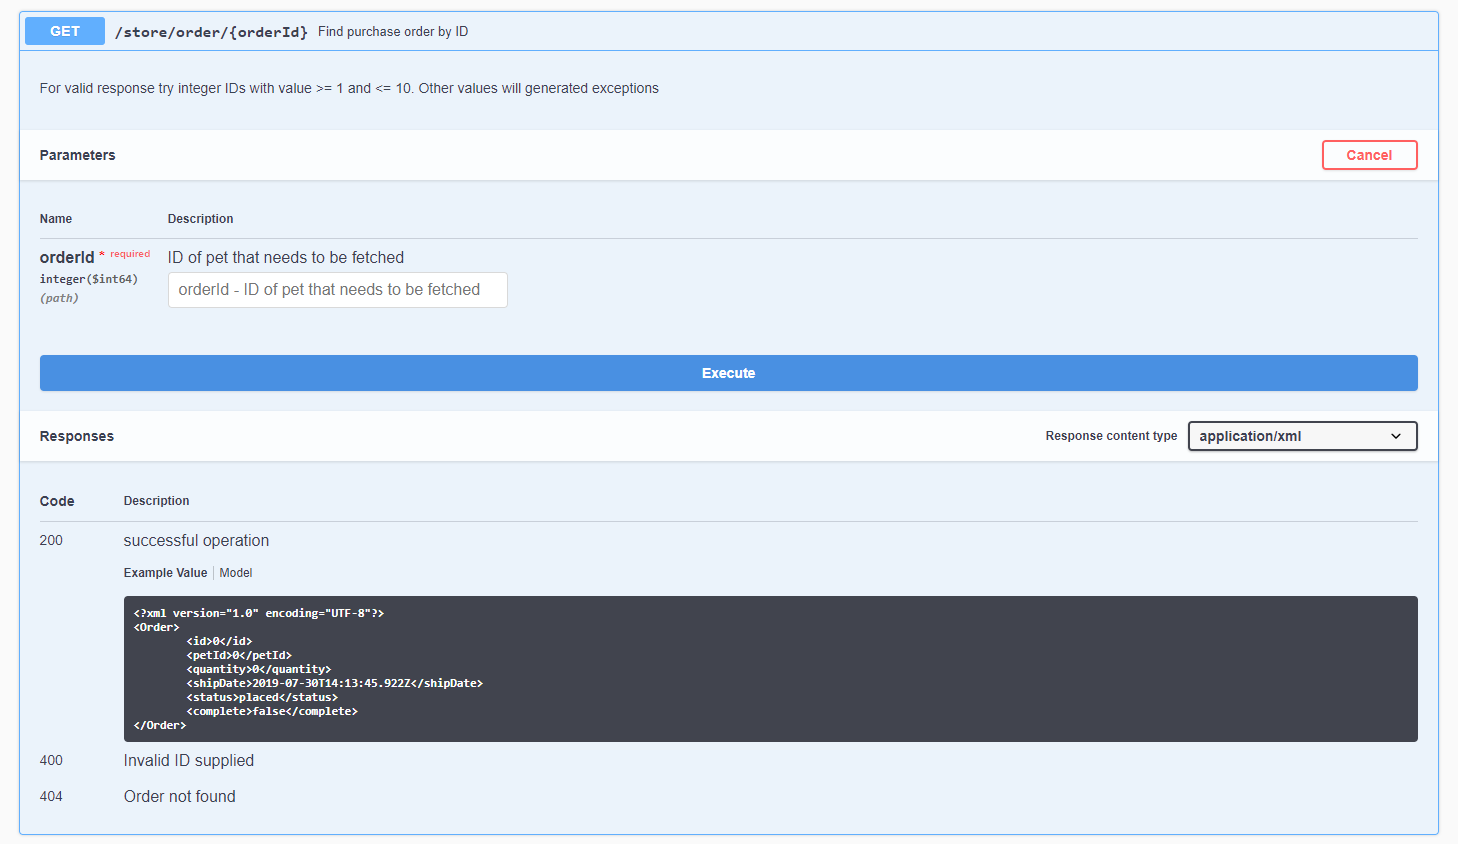
Once you've designed your API, you can generate both server and client code to get started.
In an approach called Design first, you begin with your API design and generate the code from the design.
But what if you want to write your code first and then create a Swagger documentation?
A Code first approach is the more traditional route. Once the API is directly coded, you can generate a Swagger document using different tools, such as Swashbuckle.
Let's start with creating a simple API generated from Swagger.Once you open a Swagger editor, there are several options:
Create an account in https://app.swaggerhub.com
Use the Swagger plugin for Visual Studio Code (ctrl+shift+p Swagger editor)
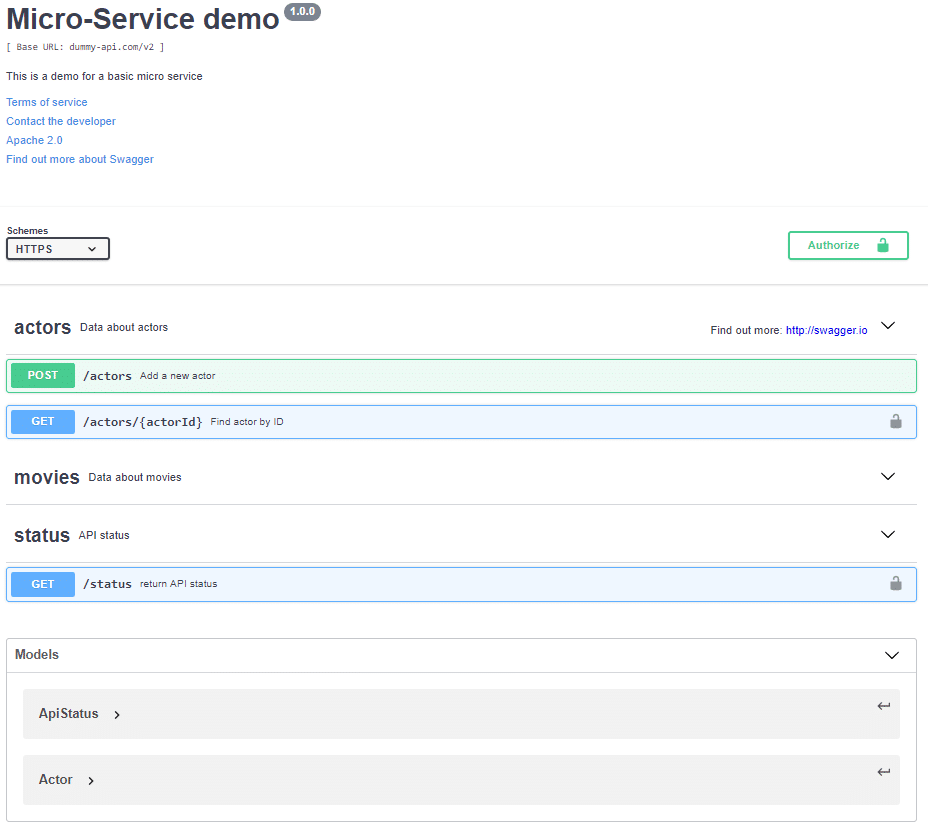
2. I created a very basic API with 3 calls and 2 modules:
This is the YAML code:
*swagger: "2.0"
info:
description: "This is a demo for a basic micro service"
version: "1.0.0"
title: "Micro-Service demo"
termsOfService: "http://swagger.io/terms/"
contact:
email: "rima_g@optimove.com"
license:
name: "Apache 2.0"
url: "http://www.apache.org/licenses/LICENSE-2.0.html"
host: "dummy-api.com"
basePath: "/v2"
tags:
This is how it looks:
3. Click on 'Generate Server' and click on your chosen language to export the server stub:
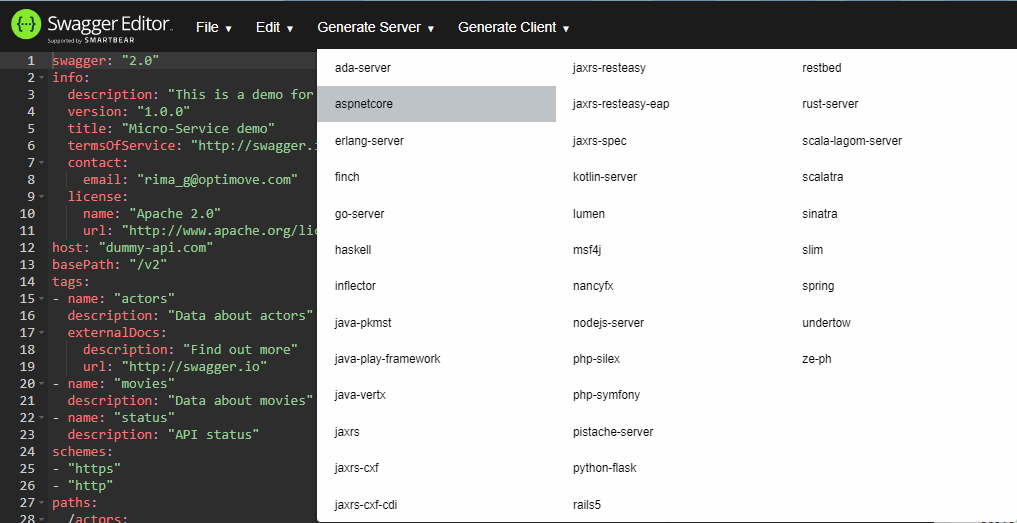
I chose aspnetcore, but of course, you can choose any language.
4. Using the command line, go to the project folder and open it in Visual Studio Code, using: 'code .' command.
5. Go to /src/IO.Swagger/Controllers/StatusApi.cs
Look at this method:

Let's change the response to something more personalized:

public virtual IActionResult GetStatus()
{
//TODO: Uncomment the next line to return response 200 or use other options such as return this.NotFound(), return this.BadRequest(..), …
ApiStatus res= new ApiStatus();
res.Message="The Notebook is great and the API is up!";
return StatusCode(200, res);
{
6. Open Terminal (Terminal->New Terminal) or CTRL+Shift+' and run build command: donet build
Now, let's look at the dockerfile. You can find it here:
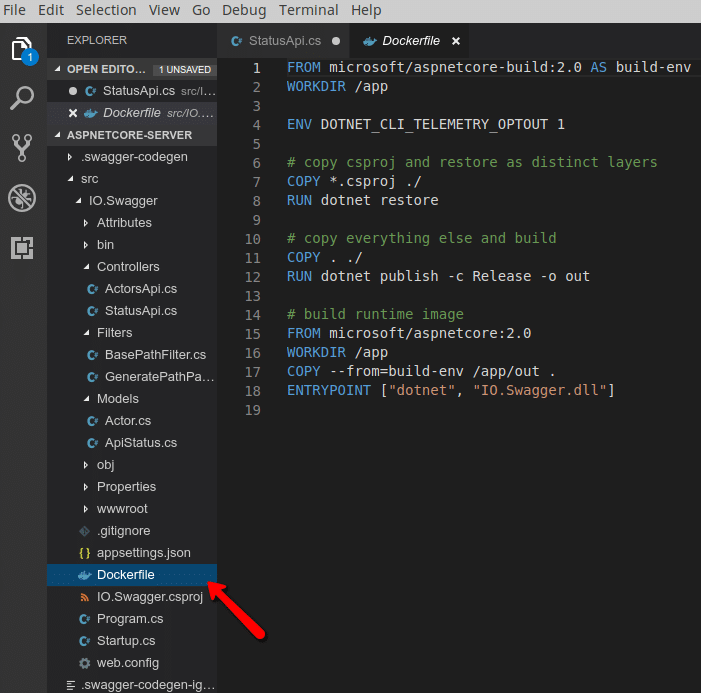
In order to create an image, we need to run the docker file:
Cd src/IO.Swagger/
And then run the build command:
docker build -t imdb-demo:1.0.0 -f Dockerfile .
Or, if you don't have sufficient permissions:
sudo docker build -t imdb-demo:1.0.0 -f Dockerfile .

'imdb-demo' stand for the image name
1.0.0 is the tag, usually to specify the version
7. Let's take a look at the images. Use this command:
sudo docker images
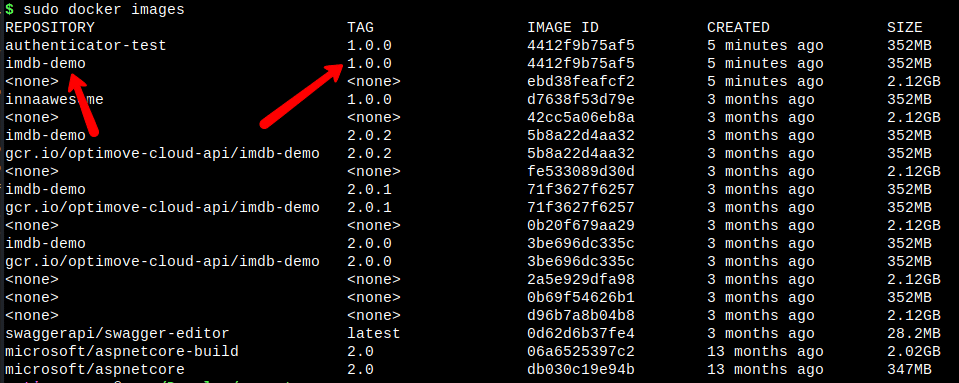
8. Run the docker image so that you can access the API via localhost:
Go back to Visual Studio code and write:
sudo docker run -d -p 3003:80 --name imdblocal imdb-demo:1.0.0

We chose port 3003 to access the API
'Imdblocal' is the name of this certain instance
9. Let's go to localhost/3003
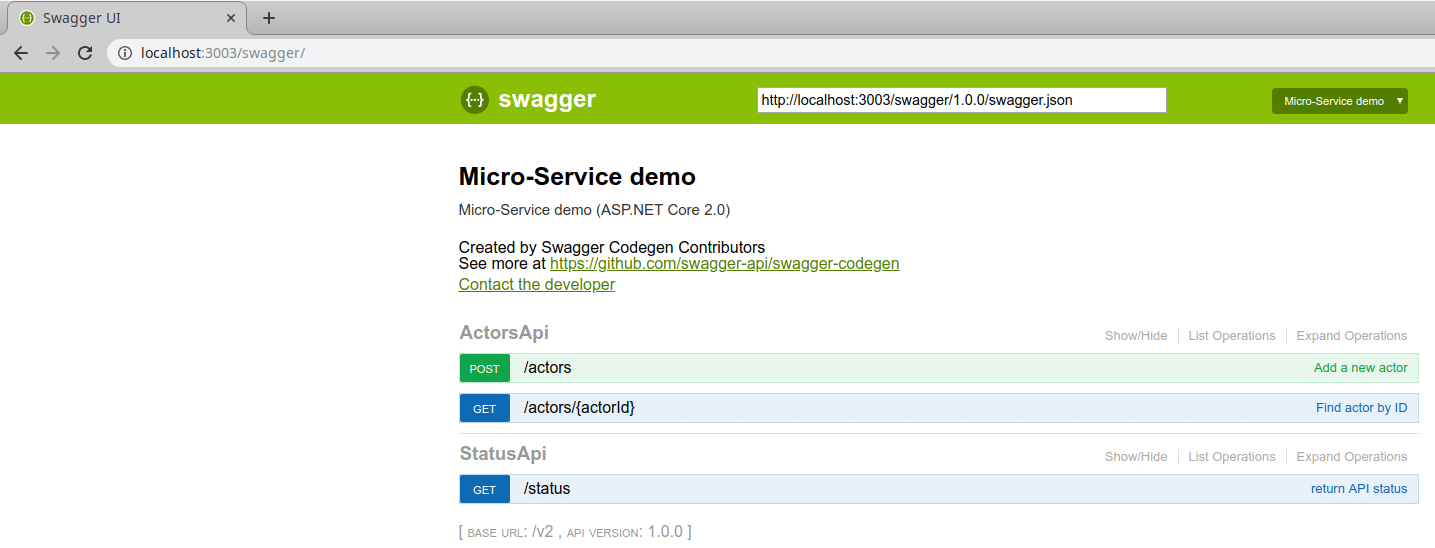
Click on /status:
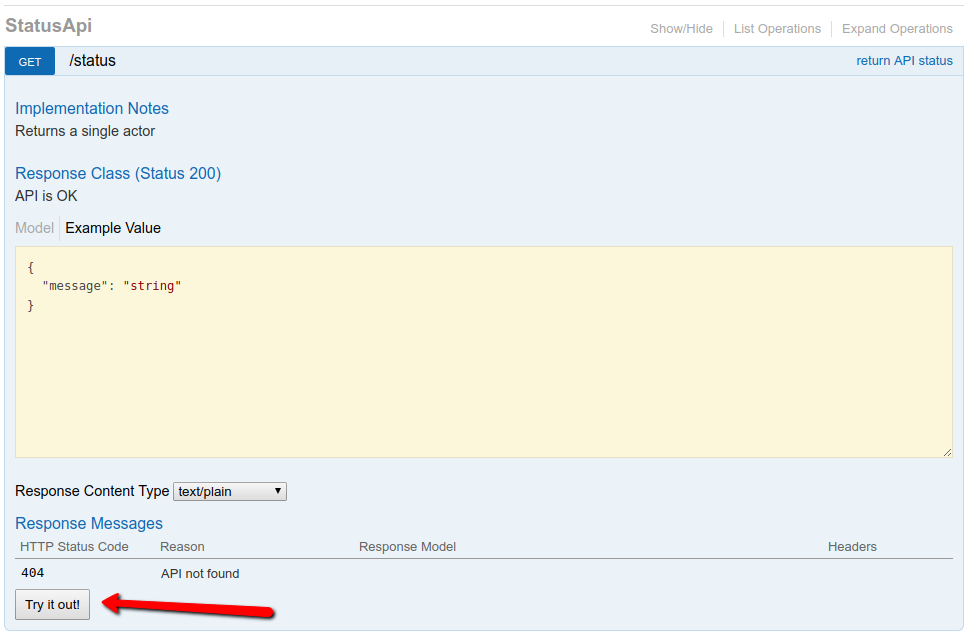
And then 'Try it out!'
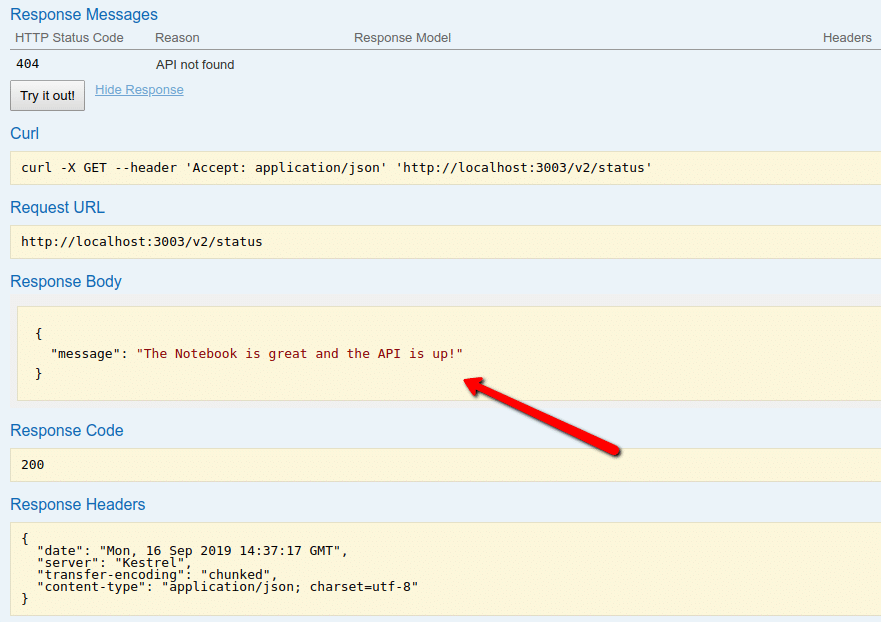
This is the custom response we wrote.
We can also access it with this Url:
Localhost:3003/v2/status

If you still want to use the code-first approach (If you already have an API code ready, or just prefer to write it from scratch), you can use a tool to help you generate your API Swagger documentation.
The full list of these tools can be found here.
For .Net Core, I used Swashbuckle.
Using Swagger and .Net Core, we learned how to easily create a basic API project. We Created a Docker image and ran it so we can access our service via localhost. Stay tuned, next time, we'll discuss deploying to production!
Exclusive Forrester Report on AI in Marketing
In this proprietary Forrester report, learn how global marketers use AI and Positionless Marketing to streamline workflows and increase relevance.


Writers in the Optimove Team include marketing, R&D, product, data science, customer success, and technology experts who were instrumental in the creation of Positionless Marketing, a movement enabling marketers to do anything, and be everything.
Optimove’s leaders’ diverse expertise and real-world experience provide expert commentary and insight into proven and leading-edge marketing practices and trends.


